Drywall Services

DRYWALL WATER DAMAGE
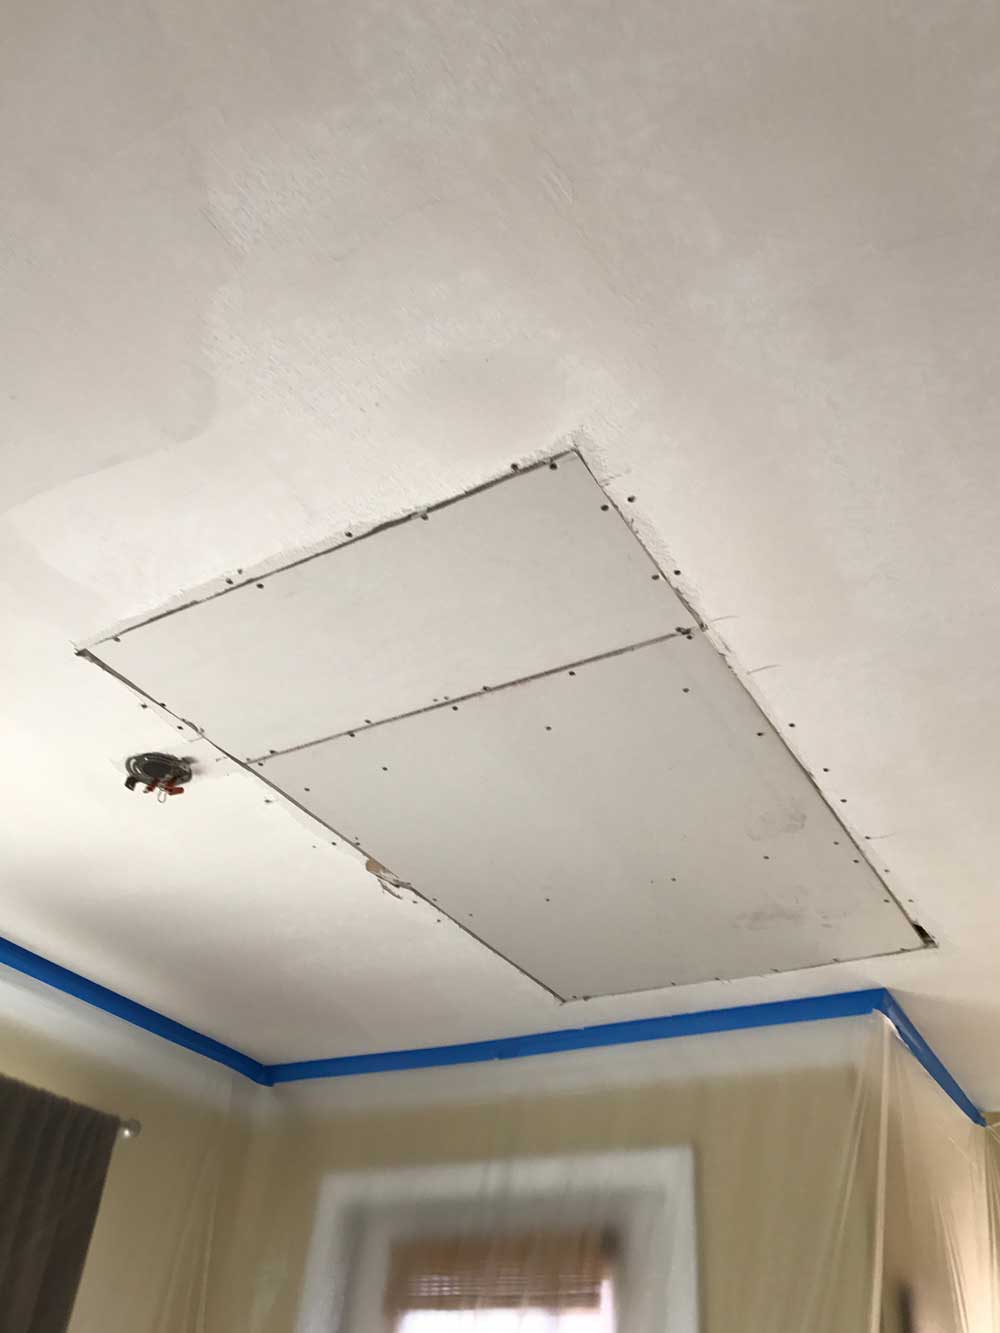
Some of the most difficult and time consuming repairs can come from water damage. Drywall can soak up water like a sponge and what appears to be a 2’ x 3’ water damaged area may in fact be a 6’ x 6’ area. When drywall is soaked, the water damaged drywall must be cut out. A common source of drywall water damage occurs in condos or high-rise buildings when a unit above has water issues causing water damage to the unit below. The water will seep or spray down through the floors and affect the ceiling of the lower unit. When this type of water damage occurs, we must often demo and replace the entire ceiling and sometimes the walls.
In older buildings the drywall water damage repair may be more complicated. Most older buildings have plaster walls and plaster repairs are more difficult because of the plaster thickness. The plaster repair process is similar to the drywall repair process.
Cut out water damaged plaster which is usually 3/4″ to 1-1/2″ thick. Then, using drywall, proceed with the drywall repair by shimming the area with 1/4″,1/2″ or 5/8″ drywall. Sometimes we can install 1/4″ drywall sheets over the entire area for a brand new ceiling or wall.
Slab leaks and re-piping jobs are another common drywall repair, sometimes involving one or two drywall patches or as many as 30 or more different patches throughout the entire house.
858-405-7737
Contact Jim

DRYWALL PATCHWORK
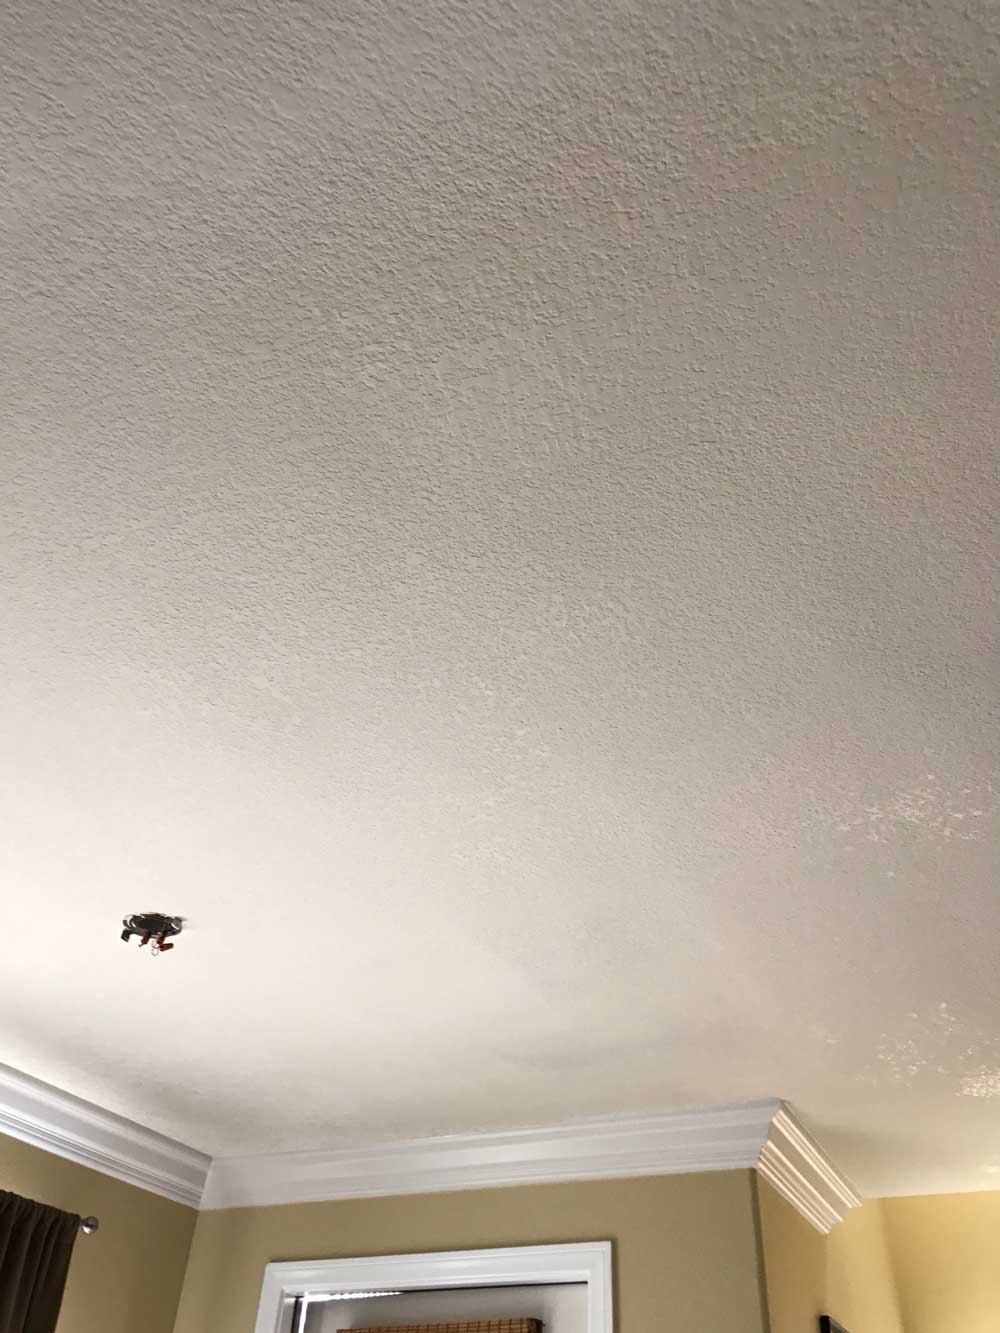
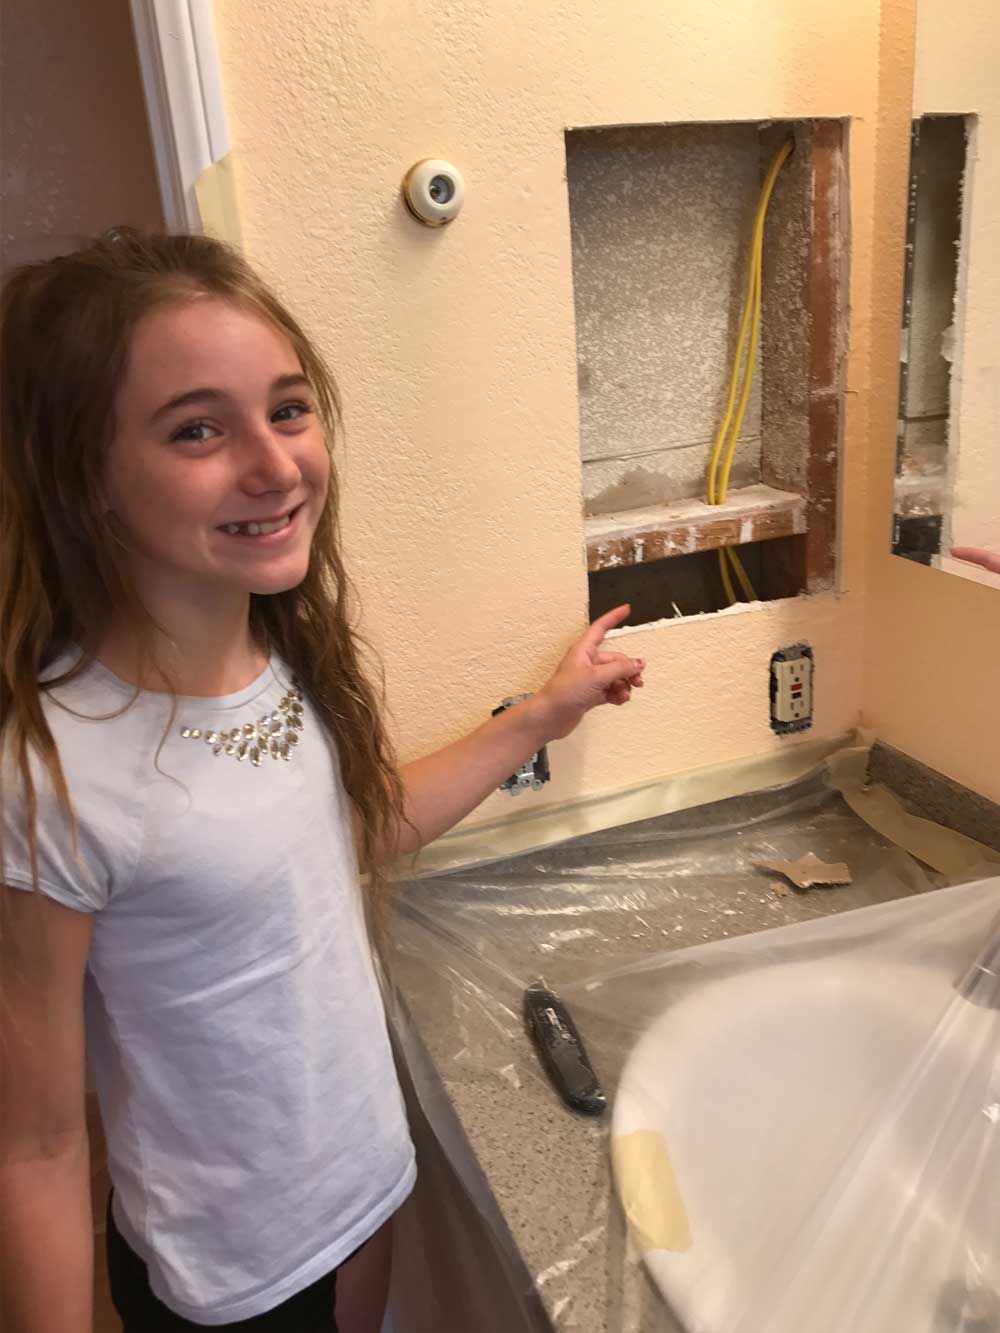
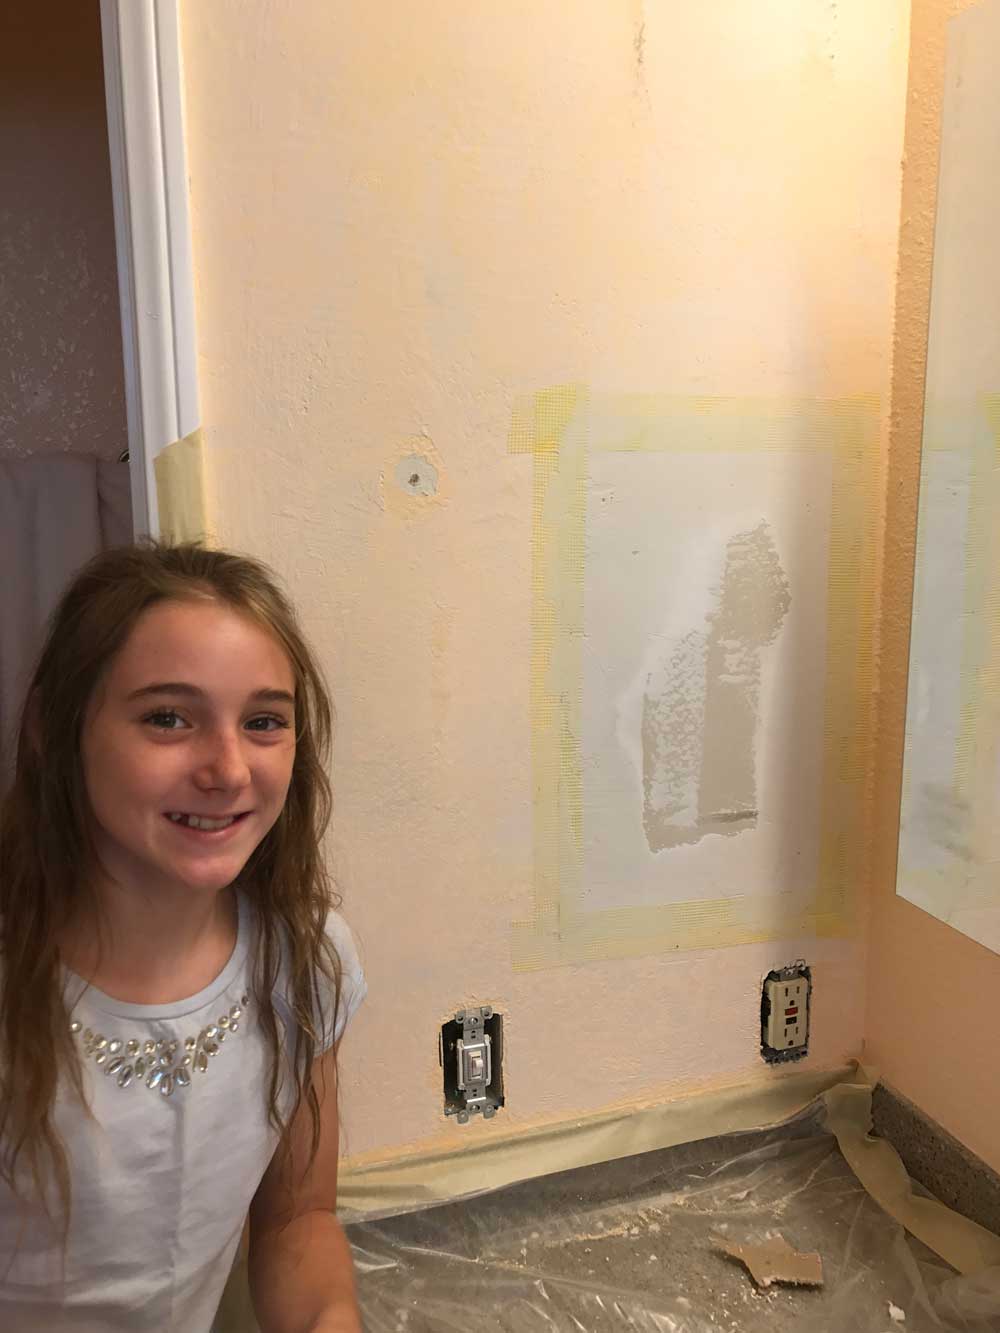
Drywall patchwork is a large part of our business at Professional Drywall. On many projects plumbers, electricians and contractors move walls or cut holes in drywall, sometimes to re-route wires or to work on leaking pipes. Following their work or repairs, these areas then require patchwork and texture. The goal of drywall patchwork is to have the walls look like they were never damaged.
When repairing a large number of holes it is more efficient to cut out one big area instead of patching many small areas. With water damaged drywall, any wet drywall must be cut out and the area allowed to dry for a few days. Once dry, we can insulate the area (if needed) and begin the patchwork. Most drywall patchwork jobs can be completed within a day or two.
858-405-7737


DRYWALL PLASTER REPAIR
Plaster repair in San Diego is very common in older communities such as La Jolla, Pacific Beach, Hillcrest and Mission Hills. As a plaster wall or ceiling ages, gravity takes its toll. An effective way to repair an old wall or plaster ceiling is to install ¼” drywall over the damaged areas. Some companies will try to repair plaster cracks using tape and joint compound. Depending on the extent of the plaster damage, this approach may or may not work. If plaster is not repaired properly it will continue to flake and chip off requiring future repairs.
858-405-7737


DRYWALL TEXTURES
Drywall repairs are typically followed by the application of texture. There are basically two kinds of texture – hand texture and spray texture.
Following an acoustic popcorn removal we typically apply by hand a smooth skip texture. Most walls, however, fall into the spray category. The most common spray textures in Southern California are orange peel and knock down.
The art of drywall texture becomes obvious when you see a poor texture job. There may be “stop” or “start” marks or areas that do not match. While not “rocket science,” a well done drywall texture match may seem like “magic.”
A common drywall texture upgrade is to coat over existing orange peel or knock down texture. Although this process is labor intensive and time consuming, it makes a dramatic difference to the appearance of walls and ceilings. Smooth walls and ceilings give homes a more custom look. When retexturing walls, many people also decide to replace square corners with more modern “bullnose” style corners.
858-405-7737


POPCORN REMOVAL
Removing an ugly popcorn ceiling is one of the best cosmetic upgrades you can make to an older home. It is generally a simple process that can be completed in one day. By properly preparing the area, we can remove the old popcorn ceiling, touch up the drywall, and apply a new drywall texture with virtually no dust or mess.
Steps To Remove Popcorn Ceilings
Step 1 – Remove small furniture, pictures, knick knacks, etc. We can work around beds and large furniture.
Step 2 – Prepare the area with plastic using a thicker plastic for floors and painters plastic on walls.
Step 3 – Moisten the acoustic popcorn ceiling with a water sprayer.
Step 4 – Scrape off acoustic popcorn ceiling taking care not to damage the drywall underneath.
Step 5 – Using drywall compound, skim coat drywall seams, nail holes, and corners. Repair any problem areas
Step 6 – Apply a smooth skip texture (or other selected texture) by hand. Spray texture options are also available.
Step 7 – Clean up.
Now you have a beautiful new ceiling. No more ugly popcorn.
What a difference!
858-405-7737

